It’s been a while since my last post. A lot of changes both personally and professionally made it difficult to blog in past 12 months. But I’m back 🙂 and happy to share a new recipe that it’s perfect to enjoy the abundance of summer fruits.
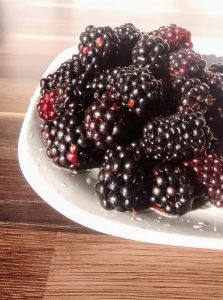
I’m not particularly green fingered but we have some scrumptious blackberries proliferating in our garden that I have no trouble growing as they just take care of themselves.
Enjoy these delicious scones made with freshly picked blackberries!

[Lemon & Blackberry Scones]
Ingredients:
250 gr. plain flour
1 lemon, zest finely grated
3 tbsp light brown sugar
2 tsp baking powder
1/2 tsp salt
5 tbsp cold unsalted butter, diced
1 cup fresh blackberries
150 ml. milk
1 large egg,beaten
1 tbsp sugar
30 gr. icing sugar
1 tbsp lemon juice
Heat oven to 400°F (205°C). Line a large baking sheet with parchment paper.
In a large bowl, combine flours, zest, sugar, baking powder and salt. Add cold butter and work into the flour mixture until the biggest pieces are the size of small peas with either your fingertips or a pastry blender. Stir in blueberries, then milk, mixing only until large clumps form. Use your hands to reach inside the bowl and gently (so gently) knead the mixture into one mass. The more you knead, the wetter the dough will get as the blueberries break up, so work quickly and knead only a few times, if you can get away with it.
Transfer dough to a well-floured counter and pat into a roughly 1-inch tall disc. Cut into 8 to 10 wedges, do not fret if the blueberries are now making a mess of the dough; it will all work out in the oven. Transfer wedges to prepared baking sheet, spacing them apart. Brush the tops of each with egg, then sprinkle with coarse sugar.
Bake for 15 to 17 minutes, until scones are golden brown on top. Serve warm. I find most scones to be best the first day, but these were not bad at all on day two, gently rewarmed in the oven before eating.
If freezing: I like to freeze scones unbaked and usually hold any egg wash until I’m ready to bake them. Simply spread the wedges on a baking sheet and chill until frozen solid and will no longer stick to each other, and pack tightly into a freezer bag. You can bake them right from the freezer; you’ll only need 2 to 4 minutes extra baking time.
Meanwhile, in small bowl, mix glaze ingredients. Drizzle over scones. Serve warm.

Andei bastante ausente pelo blog. Foram muitas as mudanças a nível pessoal e profissional que me impediram de estar mais presente por aqui. Mas agora estou de volta 🙂 e contente por partilhar convosco uma nova receita para saborear as frutas da época.
Não sou particularmente dada a jardinagem, mas estas deliciosas amoras crescem no nosso jardim sem qualquer ajuda da nossa parte.
Estes scones são uma forma irresistível de aproveitar a abundância de amoras por esta altura!
[Scones de Limão e Amora Silvestres]
Ingredientes:
250 gr. de farinha de trigo s/ fermento
raspa de 1 limão
3 colher de sopa de açúcar amarelo
2 colher de chá de fermento em pó
1 pitada de sal
5 colher de sopa de manteiga fria em pedaços
100 ml. de leite
1 chávena de amoras
1 ovo batido
açúcar q.b.
30 gr açúcar em pó
1 colher de sopa sumo de limão
Pré-aqueça o forno a 200°C (180°C ventilado, 350°F, Gás 4). Forre um tabuleiro com papel vegetal e reserve.
Misture a farinha, a raspa de limão, o açúcar, o fermento e o sal numa taça grande
Numa taça larga coloque as farinhas, a raspa de limão, o açúcar, o fermento e o sal.
Junte a manteiga fria e em pedaços e comece a amassar com as mãos até obter uma mistura areada.
Aos poucos vá adicionando o leite ao mesmo tempo que vai amassando e até conseguir formar uma bola.
Junte as amoras à massa e com as mãos envolva-as delicadamente e sem amassar demasiado.
Se achar necessário junte mais um pouco de farinha.
Transfira a massa para uma bancada enfarinhada, forme uma bola e achate-a ligeiramente.
Corte em oito partes iguais e pincele com ovo batido.
Polvilhe com açúcar mascavado e leve ao forno durante 15 minutos.
Retire e deixe arrefecer sobre uma grelha ou saboreie ainda morno.


