Lemon & Blackberry Scones
[Scones de Limão e Amora Silvestres]

Receita em Português

It’s been a while since my last post. A lot of changes both personally and professionally made it difficult to blog in past 12 months. But I’m back 🙂 and happy to share a new recipe that it’s perfect to enjoy the abundance of summer fruits.

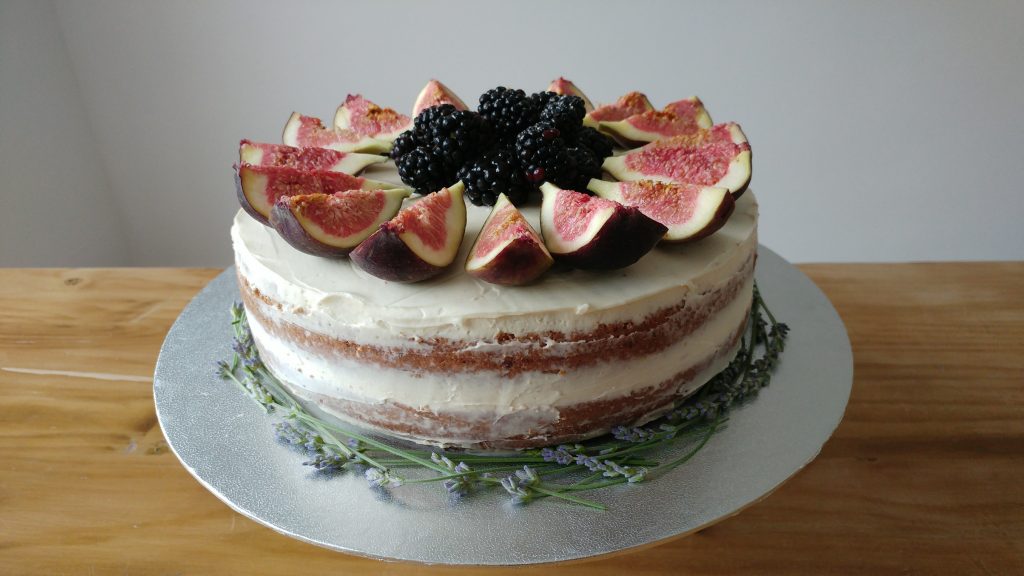
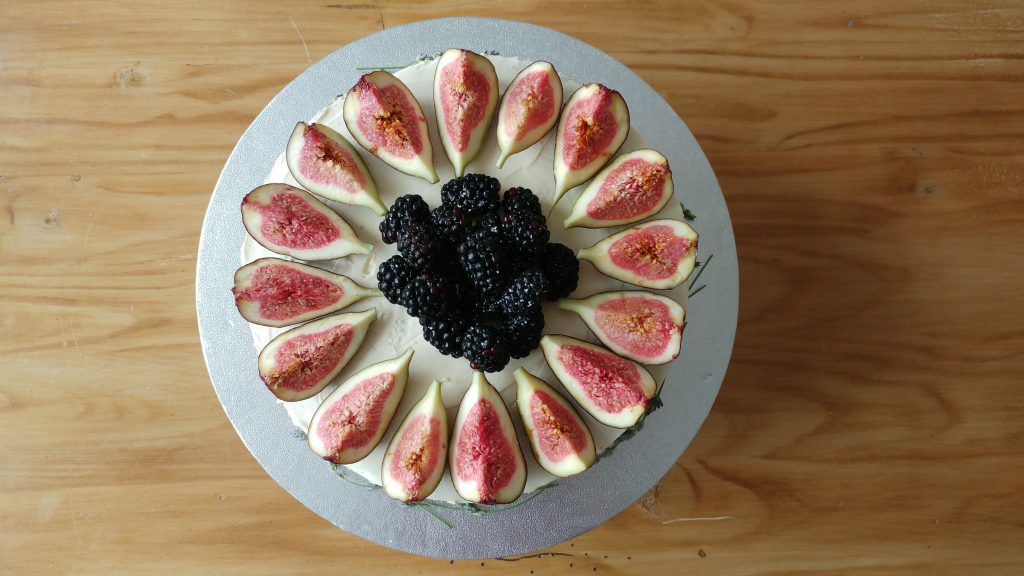
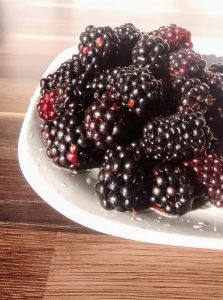
I’m not particularly green fingered but we have some scrumptious blackberries proliferating in our garden that I have no trouble growing as they just take care of themselves.

Enjoy these delicious scones made with freshly picked blackberries!

img_20161009_143353311

[Lemon & Blackberry Scones]

Ingredients:
250 gr. plain flour
1 lemon, zest finely grated
3 tbsp light brown sugar
2 tsp baking powder
1/2 tsp salt
5 tbsp cold unsalted butter, diced
1 cup fresh blackberries
150 ml. milk
1 large egg,beaten
1 tbsp sugar
30 gr. icing sugar
1 tbsp lemon juice

Heat oven to 400°F (205°C). Line a large baking sheet with parchment paper.

In a large bowl, combine flours, zest, sugar, baking powder and salt. Add cold butter and work into the flour mixture until the biggest pieces are the size of small peas with either your fingertips or a pastry blender. Stir in blueberries, then milk, mixing only until large clumps form. Use your hands to reach inside the bowl and gently (so gently) knead the mixture into one mass. The more you knead, the wetter the dough will get as the blueberries break up, so work quickly and knead only a few times, if you can get away with it.

Transfer dough to a well-floured counter and pat into a roughly 1-inch tall disc. Cut into 8 to 10 wedges, do not fret if the blueberries are now making a mess of the dough; it will all work out in the oven. Transfer wedges to prepared baking sheet, spacing them apart. Brush the tops of each with egg, then sprinkle with coarse sugar.

Bake for 15 to 17 minutes, until scones are golden brown on top. Serve warm. I find most scones to be best the first day, but these were not bad at all on day two, gently rewarmed in the oven before eating.

If freezing: I like to freeze scones unbaked and usually hold any egg wash until I’m ready to bake them. Simply spread the wedges on a baking sheet and chill until frozen solid and will no longer stick to each other, and pack tightly into a freezer bag. You can bake them right from the freezer; you’ll only need 2 to 4 minutes extra baking time.

Meanwhile, in small bowl, mix glaze ingredients. Drizzle over scones. Serve warm.


img-20170219-wa0006

Andei bastante ausente pelo blog. Foram muitas as mudanças a nível pessoal e profissional que me impediram de estar mais presente por aqui. Mas agora estou de volta 🙂 e contente por partilhar convosco uma nova receita para saborear as frutas da época.

Não sou particularmente dada a jardinagem, mas estas deliciosas amoras crescem no nosso jardim sem qualquer ajuda da nossa parte.

Estes scones são uma forma irresistível de aproveitar a abundância de amoras por esta altura!

[Scones de Limão e Amora Silvestres]

Ingredientes:
250 gr. de farinha de trigo s/ fermento
raspa de 1 limão
3 colher de sopa de açúcar amarelo
2 colher de chá de fermento em pó
1 pitada de sal
5 colher de sopa de manteiga fria em pedaços
100 ml. de leite
1 chávena de amoras
1 ovo batido
açúcar q.b.
30 gr açúcar em pó
1 colher de sopa sumo de limão

Pré-aqueça o forno a 200°C (180°C ventilado, 350°F, Gás 4). Forre um tabuleiro com papel vegetal e reserve.
Misture a farinha, a raspa de limão, o açúcar, o fermento e o sal numa taça grande

Numa taça larga coloque as farinhas, a raspa de limão, o açúcar, o fermento e o sal.
Junte a manteiga fria e em pedaços e comece a amassar com as mãos até obter uma mistura areada.
Aos poucos vá adicionando o leite ao mesmo tempo que vai amassando e até conseguir formar uma bola.
Junte as amoras à massa e com as mãos envolva-as delicadamente e sem amassar demasiado.
Se achar necessário junte mais um pouco de farinha.
Transfira a massa para uma bancada enfarinhada, forme uma bola e achate-a ligeiramente.
Corte em oito partes iguais e pincele com ovo batido.
Polvilhe com açúcar mascavado e leve ao forno durante 15 minutos.
Retire e deixe arrefecer sobre uma grelha ou saboreie ainda morno.

Continue Reading

Naked walnut cake, egg curd and mascarpone
[Bolo de noz, doce de ovos e mascarpone]

Receita em Português

I love a good wedding cake and social media keeps reminding me how beautiful and inspiring these cakes are. They are all so stunning!

A few months ago I had a very special wedding to attend: my best friend got married. What a beautiful day it was! I had the pleasure of baking them a wedding cake for their civil ceremony. It was such a delight to be part of their special day.

The cake was inspired by traditional Portuguese flavours and one of my favourite sponges: walnut cake with egg curd (filling). I also wanted to keep their rustic, greenery theme so I picked a naked cake finished with mascarpone cream and decorated with fresh fruits and lavender springs.

The cake was a success! Everyone loved it, especially the newly-weds 🙂


[Naked walnut cake with egg curd and mascarpone]

Adapted from: La Dolce Rita e Coco & Baunilha

Ingredients:
10 eggs, separated
250 gr. walnut, ground
150 gr. plain flour
150 gr. salted butter, softened
250 gr. sugar
1 tsp baking powder
1 tsp cinnamon
150 ml. water
300 gr. sugar
10 gr. cornstarch
20 gr. salted butter
250 gr. mascarpone
100 ml. whipping cream
50 gr. icing sugar
1 tsp vanilla extract
Fresh fruit to decorate

Heat the oven to 180°C (160°C fan/ 350°F/gas mark 4). Lightly grease a springform cake tin and line the base with baking parchment, then grease and flour the parchment.

Beat the softened butter with the sugar and stir in the flour, ground walnuts and baking powder. Mix until all dry ingredients are thoroughly blended. Whisk the egg whites with an electric mixer at high speed until stiff. Fold 1/3  into the sponge mixture gently. Then add the remaining egg whites in two batches carefully.

Bake in a preheated oven for 40 minutes, until well risen. Turn out on to a wire rack, peel off the lining paper and leave it to cool.

Make the egg curd: Combine sugar and water in a pan, stirring with a wooden spoon to dissolve the sugar. Heat over medium heat and bring to a boil. Do not stir. Leave it to boil until it reaches 107ºC or until pearl stage (When a cool metal spoon is dipped into the syrup and then raised, the syrup runs off in drops which merge to form a sheet). Remove from the heat and leave it to cool for 10 minutes.

In a bowl whisk the yolks and the cornstarch until fully incorporated. Then start dropping in the sugar syrup, a little at a time, and stirring continuously. Put in a pan over a low heat and stir continuously until thick. Once it starts boiling count 1 minute and 30 seconds, remove from the heat and add the cold butter, stirring until smooth. Then set aside to cool slightly with a layer of clingfilm over to prevent a skin forming and put in the fridge for at least 4 hours.

Make the mascarpone frosting: Whip the cream in a large bowl until you have medium-firm peaks, then set aside. In a separate bowl, beat the mascarpone, vanilla and sugar together until stiff, then fold through the whipped cream.

Assemble the cake: Cut the sponge in half horizontally to create 2 rounds. Put a sponge on a platter and pipe the frosting around the edge of the cake. In the middle spread with a good layer of egg curd and top with the other half. Use the mascarpone frosting to cover the top and sides of the cake, smoothing with a palette knife. Put the cake in the fridge for 30 minutes to cool and set. Use the remaining frosting and smooth until the desired finish. Chill the cake for 2 hours before serving. Just before slicing decorate with quartered figs and lavender springs.


Adoro bolos de casamento, são todos sempre tão bonitos! E as redes sociais estão sempre a relembra-me do quão inspiradores estes bolos são.

Há uns meses atrás tive o prazer de ser convidada para um evento muito especial: o casamento da minha melhor amiga! Foi um dia memorável e muito bonito! E para celebrar o casamento civil não podia faltar um bolinho! Obrigada por me deixarem fazer parte deste dia tão especial.

O bolo foi inspirado em alguns dos sabores tradicionais da doçaria portuguesa e num dos meus bolos favoritos: bolo de noz com doce de ovos. Na elaboração do bolo tentei manter o tema rústico do casamento e a escolha foi um naked cake com creme de mascarpone, decorado com fruta e raminhos de lavanda.

O bolo foi um sucesso!! Toda gente adorou, especialmente os noivos 🙂


[Bolo de noz com doce de ovos e mascarpone]

Adaptado de: La Dolce Rita e Coco & Baunilha

Ingredientes:
10 ovos, separados
250 gr. nozes raladas
150 gr. farinha sem fermento
150 gr. manteiga
250 gr. açúcar
1 colher de chá de fermento
1 colher de chá de canela
150 ml. água
300 gr. açúcar
10 gr. maizena
20 gr. manteiga
250 gr. mascarpone
100 ml. natas para bater
50 gr. açúcar em pó
1 colher de chá de extracto de baunilha
Fruta para decorar

Pré-aqueça o forno a 180°C (160°C ventilado, 350°F, Gás 4). Unte uma forma de bolo com fundo amovível, forre o fundo com papel vegetal untado e enfarinhado.

Bater a manteiga amolecida com o açúcar e adicionar a farinha, as nozes e o fermento. Misturar bem os ingredientes secos. Bater as claras em castelo e adicionar 1/3 à mistura anterior delicadamente. Juntar as restantes claras em duas vezes, envolvendo na massa delicadamente.

Leve ao forno durante cerca de 40 minutos até estar firme no meio. Passado este tempo retire do forno, desenforme, retire o papel vegetal e deixe arrefecer completamente.

Doce de ovos: Misture o açúcar e a água numa panela, mexendo com uma colher de pau até dissolver o açúcar. Leve ao lume até ferver, sem mexer. Deixe ferver até atingir o ponto de pérola (ou até chegar aos 107ºC). Pode também identificar o ponto de pérola quando, com a ajuda de uma colher, deixa escorrer o líquido e da extremidade corre um fio mais espesso com uma bola suspensa na extremidade. Retire do lume e deixe arrefecer durante 10 minutos.

Numa taça misture as gemas e a maizena. Quando estiver bem envolvido, deite o líquido anterior em fio às gemas, mexendo sempre. Coloque a panela novamente ao lume e deixe engrossar, mexendo sempre. Assim que começar a ferver, conte 1 minuto e 30 segundos, retire do lume e junte a manteiga fria, mexendo até envolver bem. Deixe arrefecer e cubra com película aderente. Leve ao frigorífico pelo menos 4 horas antes de usar.

Creme de mascarpone: Numa taça bata as natas até ficarem firmes e reserve. Bata o mascarpone com a baunilha e o açúcar em pó até ficar bem cremoso, incorporando por fim as natas previamente batidas.

Montagem: Corte o bolo horizontalmente em 2 partes iguais. Coloque uma metade do bolo no prato de serviço e faça uma auréola de creme de mascarpone à volta de toda a extremidade. No centro espalhe uma camada generosa do doce de ovos, alise bem e cubra com a outra metade do bolo. Espalhe creme de mascarpone nas laterais e no topo do bolo, alisando bem com uma espátula. Leve o bolo ao frigorífico cerca de 30 minutos para solidificar bem. Utilize o restante creme e alise até ficar com o aspecto desejado. Leve o bolo ao frigorífico durante 2 horas antes de servir. Por fim decore com figos frescos (ou outra fruta a gosto) e raminhos de lavanda.

Continue Reading

Wimbledon cake
[Bolo Wimbledon]

Receita em Português

Summer is upon us and delicious strawberries are in season, making for perfect desserts.

I baked this cake for a summer farewell do, although the sunshine was missing 🙂 One of our lovely volleyball club members was leaving and a cake seemed like a good send off surprise!

Whilst planning this recipe, I wanted to keep the sporty and summery theme and at the time Wimbledon was around the corner. No summer dessert collection would be complete without strawberries and cream.

This dessert is an irresistible way to celebrate all the goodness in summer fruits. All we need now is a little bit of sunshine to accompany it 🙂


[Wimbledon cake]

Adapted from: Mary Berry’s complete cookbook

Ingredients:
3 eggs
90 gr. caster sugar
90 gr. self-raising flour
300 ml. whipping cream
125 gr. strawberries, sliced, plus extra to decorate

Heat the oven to 190°C (170°C fan/ 375°F/gas mark 5). Lightly grease a springform cake tin and line the base with baking parchment, then butter the parchment.

Put the eggs and sugar into a large bowl. Whisk with an electic mixer at high speed until the mixture is pale and thick. Sift in half of the flour and fold in gently. Then repeat with the remaining flour.

Bake in a preheated oven for 30-35 minutes, until well risen and golden. Turn out on to a wire rack, peel off the lining paper and leave to cool.

Split the cake in half horizontally and sandwich the layers together with half of the whipped cream and the sliced strawberries, pressing down gently. Spread the remaining cream on top of the cake and decorate with strawberry halves.


O Verão é o meu mês favorito do ano, desde sempre. Adoro as cores, os sons, os cheiros, os sabores e as sensações que nos permite. E temos, claro, ingredientes à nossa escolha muito mais coloridos e super apetitosos, como é o caso dos frutos vermelhos.

Recentemente, uma das nossas muito queridas jogadoras do clube de voleibol regressou à sua terra Natal e este bolo pareceu-me a melhor forma de tornar esta despedida mais dócil.

Na elaboração do bolo queria manter a influência desportiva e usar o sabor fresco das frutas de Verão. Para além disso, o torneio de ténis de Wimbledon estava mesmo à porta e não podia faltar uma receita que envolve-se morangos e natas.

Este bolo é uma forma irresistível de celebrar os deliciosos sabores de Verão. Agora só precisamos que o tempo colabore 🙂


[Bolo Wimbledon]

Adaptado do livro: Mary Berry’s complete cookbook

Ingredientes:
3 ovos
90 gr. açúcar branco fino
90 gr. farinha para bolos
300 ml. natas para bater
125 gr. morangos, fatiados, mais alguns extra para decorar

Pré-aqueça o forno a 190°C (170°C ventilado, 375°F, Gás 5). Unte uma forma de bolo com fundo amovível e forre o fundo com papel vegetal. De seguida unte também o papel vegetal.

Coloque os ovos e o açúcar numa taça grande. Bater a mistura com a ajuda de uma batedeira de arames até aumentar de volume e obter uma massa pálida e espessa. Adicione metade da farinha e envolva delicadamente. Repita com a restante farinha.

Leve ao forno pré-aquecido durante cerca de 30-35 minutos até aumentar de tamanho e estar dourado. Desenforme, retire o papel vegetal e deixe arrefecer completamente.

Divida o bolo em metade pela horizontal e recheie com metade das natas batidas e os morangos fatiados. Por fim, espalhe as restantes natas por cima do bolo e decore com morangos.

Continue Reading

Rhubarb & custard cake
[Bolo de ruibarbo e creme inglês]

Receita em Português

Rhubarb and custard cake

This cake represents the perfect marriage between two quintessential british flavours: custard and rhubarb. Before I moved to the UK rhubarb was pretty unknown to me and I can’t remember ever trying it.

I love the tart taste of Rhubarb and the sweetness of the custard, which gives a unique flavour to this cake. It is a perfect way of transforming the sourness to tasty-ness 🙂

Also, the rhubarb was picked right from our garden and it is organic too!


[Rhubarb and custard cake]

Adapted from Good toKnow

Ingredients:
2 tbsp custard powder
55 gr. caster sugar
250 ml. milk
1 tsp vanilla extract
400 gr. rhubarb
150 gr. caster sugar, plus 3 tbsp extra
200 gr. rhubarb jam
3 eggs
100 ml. sunflower oil
100 ml. natural yogurt
1 tsp vanilla extract
285 gr. self-raising flour
1/2 tsp bicarbonate of soda

Start by making the custard. Blend the powder with the sugar in a small pan, and whisk in the milk. Bring the mixture to a boil and stir until thickened. Remove from the heat and add the vanilla extract, then set aside to cool slightly with a layer of clingfilm over to prevent a skin forming.

Heat the oven to 160°C (140°C fan/ 325°F/gas mark 3). Lightly grease a springform cake tin and line the base and sides with baking parchment. Cut the rhubarb into 8cm lengths so that they fit perfectly into the base of the cake tin, as shown in the photo (trim them if necessary). Toss the rhubarb with 3tbsp sugar and set aside.

Combine the remaining sugar, eggs, oil, yogurt and vanilla in a large bowl. Beat until smooth. Sift the flour and bicarbonate into the misture and fold in gently. Spoon half the mixture into the tin, carefully spreading it right to the edges.

Spread the custard over the cake mixture, then spread the jam on top of the of the custard layer. Dollop spoonfuls of the remaining cake batter over the custard and carefully spread the cake batter to completely cover the custard and jam layer. Arrange the rhubarb on top, keeping it away from the edges of the tin. Sprinkle over 1 tablespoon of the extra sugar. Cover loosely with a sheet of foil.

Bake for 1 hr 30mins, then uncover and cook for 15 mins, until the cake is golden and firm to the touch in the middle. Leave in the tin to cool before transferring to a wire rack.


Este bolo representa o casamento prefeito entre dois sabores tipicamente britânicos: o ruibarbo e o creme inglês. Antes de viver no Reino Unido, este vegetal era um completo desconhecido para mim e não tenho memória de o ter provado anteriormente.

Adoro a combinação do sabor ácido do ruibarbo com o doce do creme inglês que dá a este bolo um sabor único. É a forma perfeita de transformar a acidez numa delícia 🙂

Além disso, este ruibarbo veio directamente do nosso quintal e é biológico também!


[Bolo de ruibarbo e creme inglês]

Adaptado de Good toKnow

Ingredientes:
2 colheres de sopa de pudim flan instantâneo em saqueta
55 gr. açúcar branco fino
250 ml. leite
1 colher de chá de extracto de baunilha
400 gr. ruibarbo
150 gr. açúcar branco fino, mais 3 colheres de sopa extra
200 gr. compota de ruibarbo
3 ovos
100 ml. óleo vegetal
100 ml. iogurte natural
1 colher de chá de extracto de baunilha
285 gr. farinha para bolos
1/2 colher de chá de bicarbonato de sódio

Numa panela pequena junte o pudim flan e o açúcar, misturando de seguida o leite. Leve ao lume até engrossar, mexendo sempre. Retire do lume, adicione o extracto de baunilha e deixe arrefecer, cobrindo o pudim flan com película aderente para não ganhar aquela capa dura.

Pré-aqueça o forno a 160°C (140°C ventilado, 325°F, Gás 3). Unte uma forma de bolo com fundo amovível e forre o fundo e os lados com papel vegetal. Corte o ruibarbo em pedaços de cerca de 8cm, de modo a fazer o efeito que aparece nas fotos. Colocar o ruibarbo numa taça com as 3 de colheres de açúcar e deixar repousar.

Bater o restante açúcar com os ovos, óleo, iogurte e baunilha. Adicione a farinha, peneirada com o bicarbonato, e misture delicadamente sem bater. Deite metade da massa na forma e com cuidado espalhe bem. Distribua o pudim flan sobre a camada de massa e espalhe o doce de ruibarbo por cima do pudim flan. Deite a restante massa na forma e espalhe cuidadosamente,  de modo a cobrir completamente o pudim flan e o doce. Por fim, distribua o ruibarbo por cima da massa tal como mostra a foto, evitando que fique muito próximo dos lados. Povilhe com 1 colher de açúcar e cobrir com uma folha de alumínio.

Leve ao forno durante cerca de 1h30 minutos. Passado este tempo retire a folha de alumínio e deixe cozer mais 15 minutos, até estar dourado ou firme no meio. Deixar arrefecer na forma completamente antes de servir.

Continue Reading